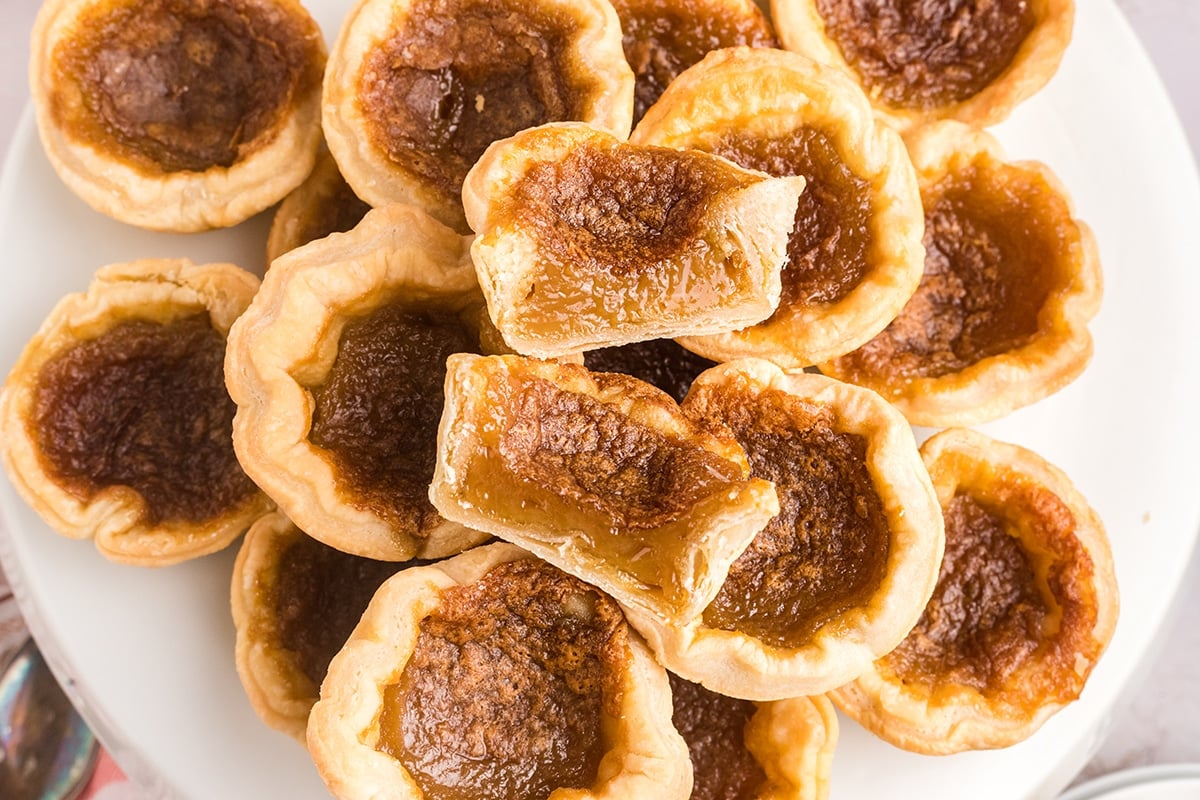
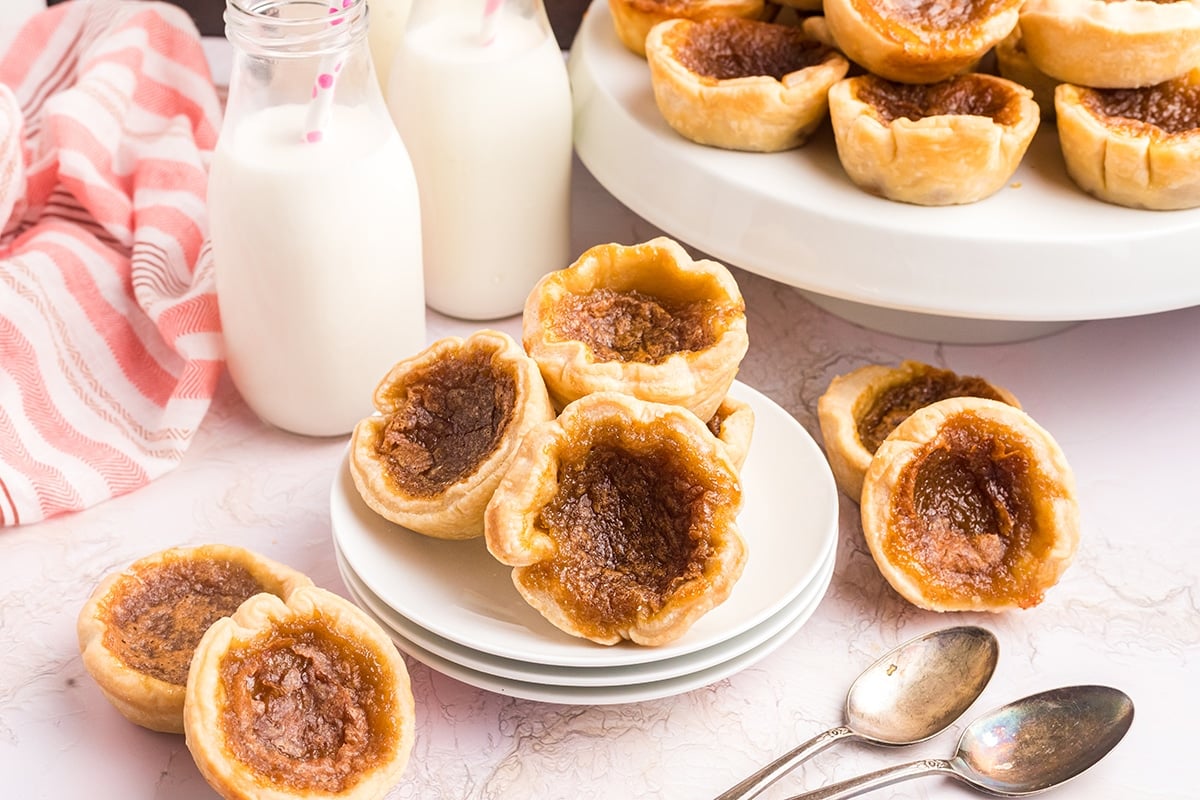
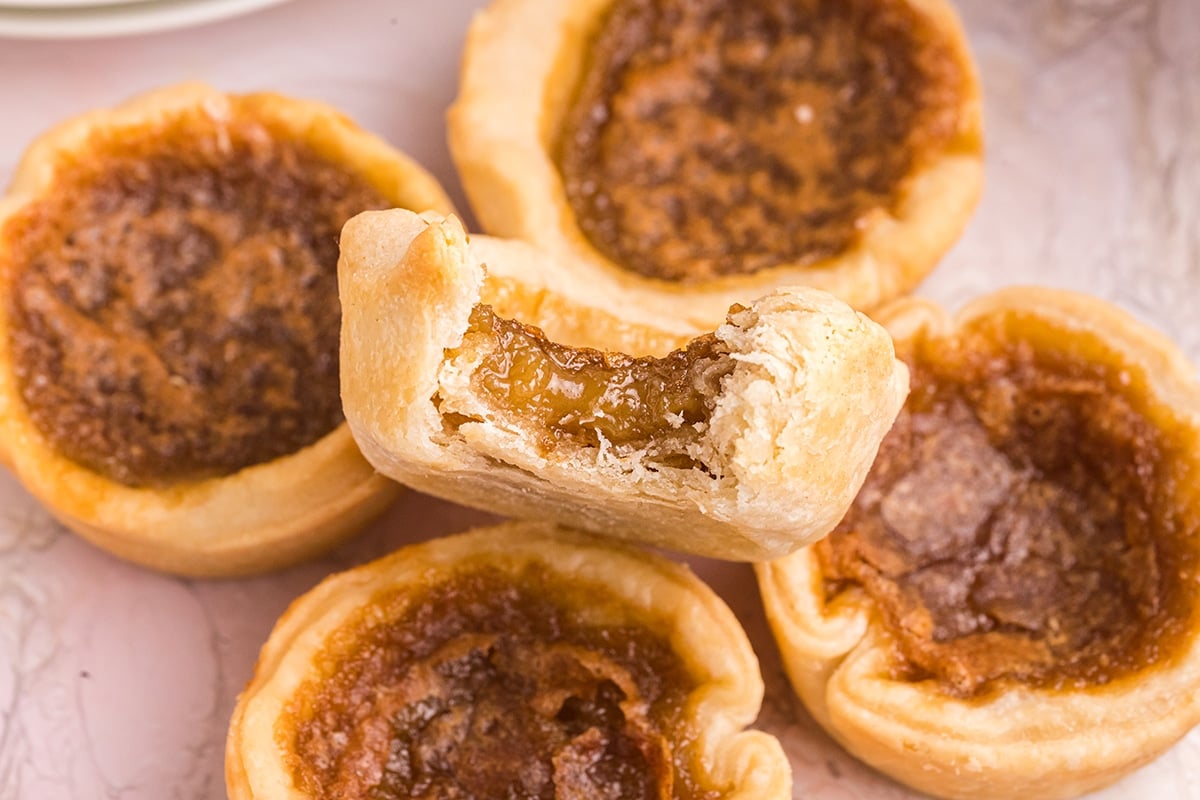
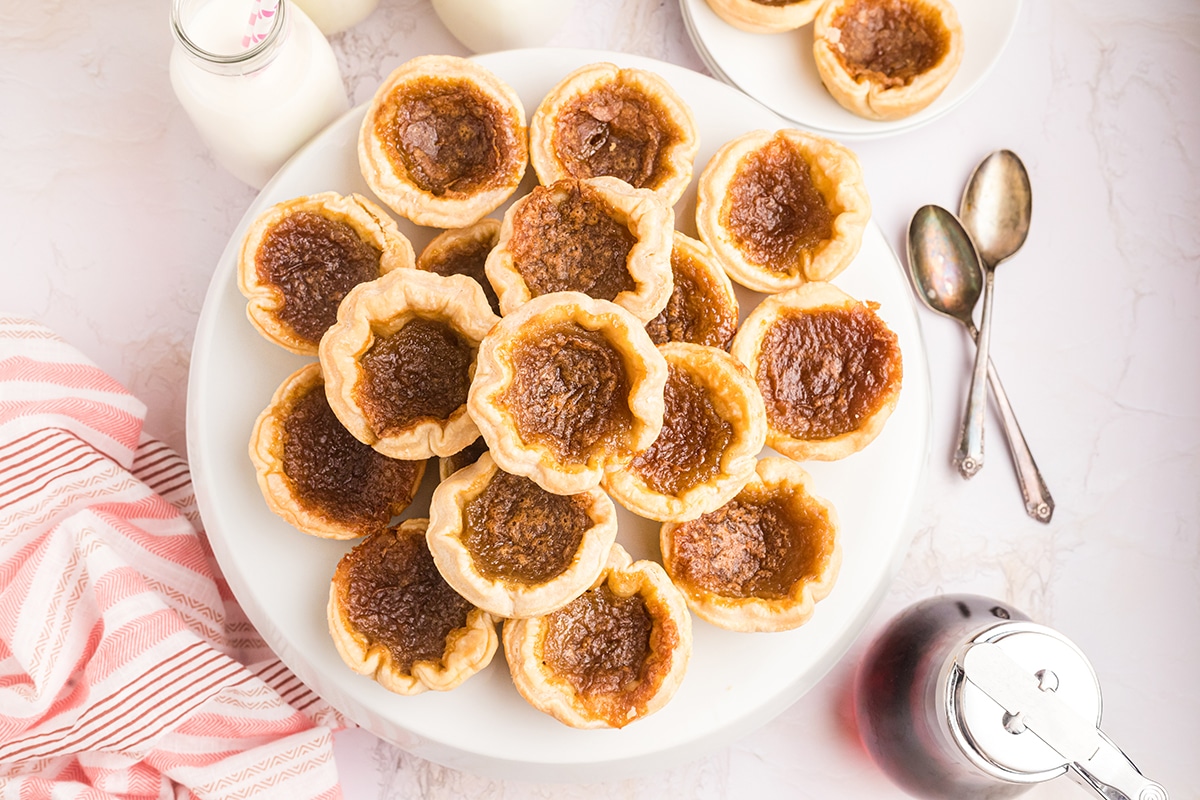
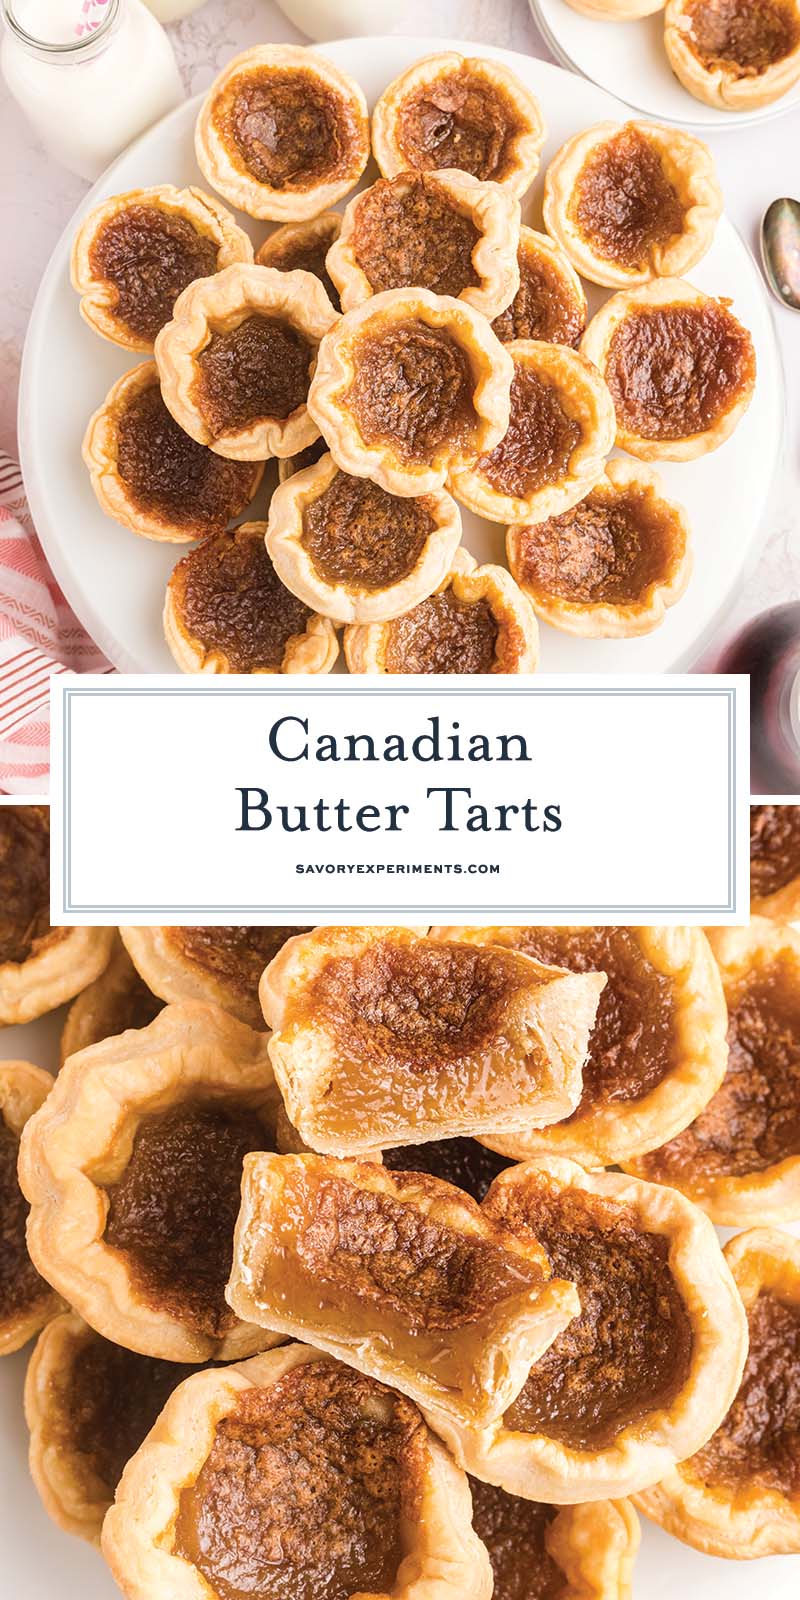
A rich dessert with rich roots that has stood the test of time, these Canadian Butter Tarts are a total classic! A maple syrup custard filling in buttery tart shells makes for a tasty handheld treat.
Ingredients Checklist
The ingredient list for these canadian butter tarts is fairly simple using kitchen basics.. A full list of ingredients with measurements for this recipe is available in the printable recipe card below.
- Flour- all purpose flour works for this one. Bread flour can also be used. Cake flour does not work.
- Sugar– just plain, white sugar is where the sweetness comes from.
- Fine sea salt– omit if using salted butter.
- Unsalted butter– to make the pastry, the butter needs to be super cold, keep it in the fridge until you are ready to use it. Cutting it into small chunks helps it to evenly incorporate.
- Cold water- from the tap is fine, just make sure it is as cold as it can get! You can use ice water, but make sure the total volume is correct, don’t add ice to the correct cup of water.
- Unsalted butter- if you use salted, omit the additional salt. Make sure butter is adequately softened, but not melted. Melting the butter will have a negative impact on the filling rising.
- Brown sugar– light or dark brown sugar works.
- Eggs– it’s a custard- it needs eggs!
- Maple syrup- this is probably the most important part, use real maple syrup, not maple flavored sugar water. To get the right texture, a thick syrup is ideal. Some recipes use corn syrup, but I prefer the flavor of maple syrup.
- Fine sea salt- if using coarse, double the amount. This balance the sugar and emphasizes natural maple flavors.
- Vanilla Extract- Almond works well too. Vanilla bean paste can be used as well.
Get to Baking!
Making these canadian butter tarts might just be easier than you think! Just follow these simple steps.
- Make crust dough. Using a food processor, pulse the flour, sugar, and salt. Add the cold butter in chunks, pulse until butter is in small pieces. Add the cold water and pulse until the dough starts coming together.
- Chill dough. Turn the dough onto two plastic wrap pieces lying flat. Cover over and pat into a disc. Refrigerate for at least one hour. Dough will be super sticky, this is normal.
- Roll and cut dough. Sprinkle a small amount of flour on a flat surface and roll out one portion at the time on lightly floured surface, about 1/8 of an inch thick. Use a round cutter or lid and cut round pieces. Throw out the scraps or use for another recipe!
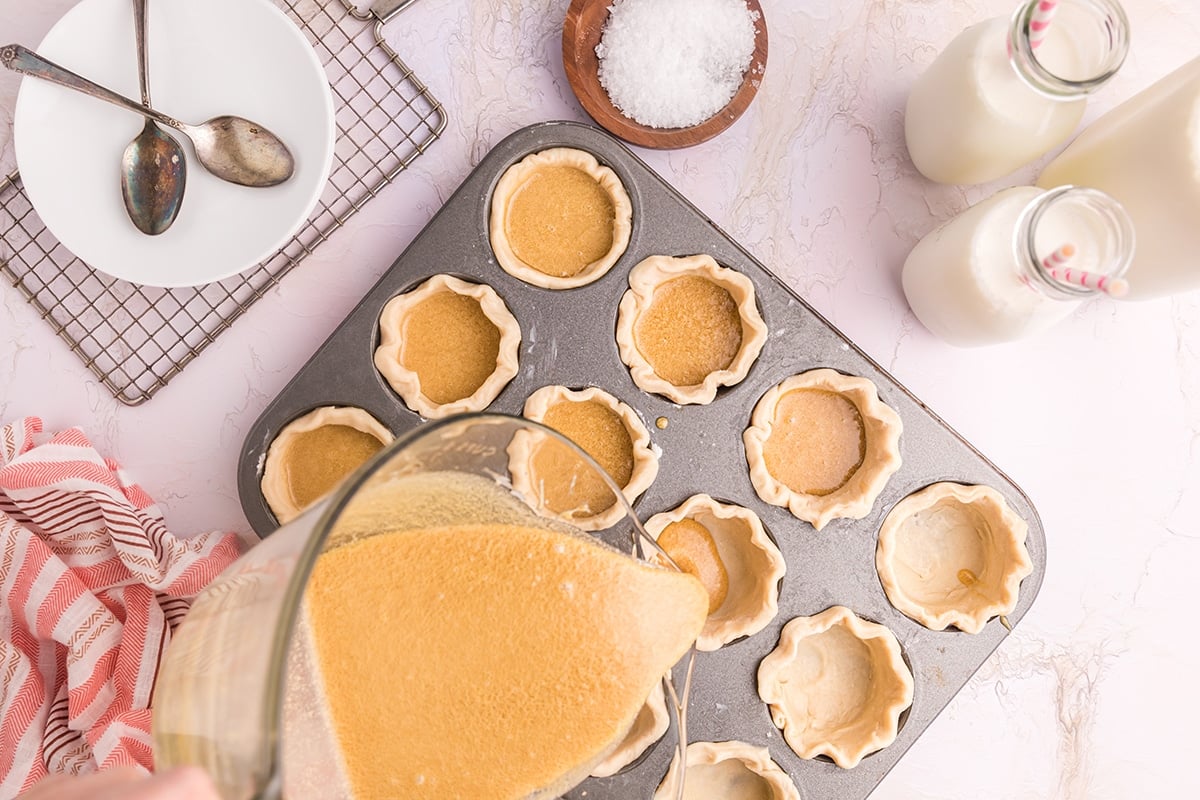
- Add dough to muffin pan. Grease muffin pan. Press each dough circle into the bottom of a muffin pan cup. Refrigerate while making the filling.
- Make filling. Cream the butter and sugar together in a large bowl. Add the eggs one at the time. Add the maple syrup, salt, and vanilla extract. The filling is a chunky custard and very loose. If you make this ahead and set aside, you’ll need to whisk before pouring into muffin tins.
- Pour filling into crust. Pour the filling mixture into pie crust and bake in preheated oven. It is easiest to use a glass measuring cup with a pour spout.
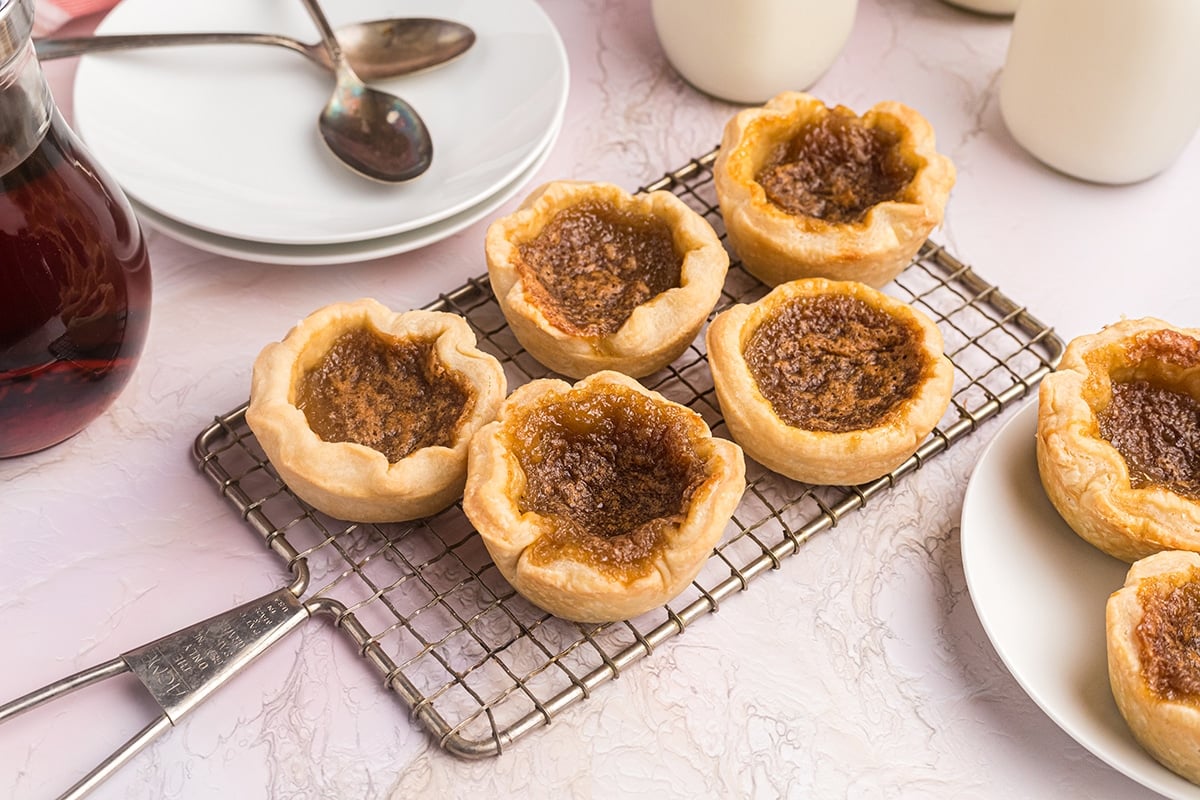
- Allow to cool. Let the tarts cool for five minutes in the pan and remove to a cooling wire rack.

5S Philosophy 👩🏻
- Salt – Because we use unsalted butter in both the crust and the filling, we add a pinch of fine sea salt to both as well. It helps to bring out the other flavors.
- Sauces – You could drizzle any number of dessert sauces over these butter tarts. White chocolate sauce, butterscotch sauce or salted caramel sauce would be delicious.
- Swaps – Try adding dried fruit or nuts to the filling. Things like raisins, currants, dates, figs, walnuts or chocolate chips would be perfect.
- Senses – These Canadian butter tarts are a golden, gooey indulgence with a crisp, flaky shell that shatters gently under your fork. The filling is rich and buttery—sweet like caramel, with a hint of vanilla and brown sugar warmth.
Storage and Freezing
How to Store
Mini butter tarts keep well at room temperature for up to 2 days or in the refrigerator for up to a week. Place them in an airtight container.
Can I Freeze Butter Tarts?
Yes, you can freeze Canadian Butter Tarts for up to two months in an airtight container or freezer bag.
Canadian Butter Tarts FAQs
Butter tarts are not as common or widely recognized in the United States as they are in Canada. They are more of a Canadian specialty and are not typically found as a mainstream dessert in American cuisine.
The main difference is that butter tarts do not typically contain pecans. They also commonly have raisins which are not used in pecan pie. We do have a recipe for pecan pie tarts too!
More Easy Desserts
We do love easy dessert recipes over here, but they need to be easy- we all know I am a lazy baker!
Canadian Butter Tarts
Ingredients
Crust
- 2-1/2 cups flour
- 1 tablespoon sugar
- 1 teaspoon fine sea salt
- 1 cup unsalted butter , cold
- 3/4 cup water , cold
Filling
- ¼ cup unsalted butter , at room temperature
- 1/2 cup brown sugar
- 2 eggs , at room temperature
- 1 cup maple syrup
- 1/4 teaspoon fine sea salt
- 1 teaspoon vanilla extract
Instructions
Crust
- Using a food processor, pulse the flour, sugar, and salt. Add the cold butter in chunks, pulse 5 to 8 times, or until butter is in small pieces. Add the cold water and pulse until the dough starts coming together.
- Turn the dough onto 2 plastic wrap pieces lying flat. Cover over and pat into a disc. Refrigerate for at least 1 hour. Dough will be super sticky, this is normal.
- Sprinkle a small amount of flour on a flat surface and roll out one portion at the time, about 1/8 of an inch thick. Use a round cutter or lid (4 inches) and cut 15 pieces.
- Grease 1 muffin pan completely and 3 muffin cups from a second pan. Press each dough circle into the bottom of a muffin pan cup. Refrigerate while making the filling.
- Preheat the oven to 350°F.
Filling
- Cream the butter and sugar together. Add the eggs one at the time. Add the maple syrup, salt, and vanilla extract. The filling is a chunky custard and very loose. If you make this ahead and set aside, you'll need to whisk before pouring into muffin tins.
- Pour the filling into pie crust and bake for 25 minutes. It is easiest to use a glass measuring cup with a pour spout.
- Let the tarts cool for 5 minutes in the pan and remove to a cooling rack.
- If you've tried this recipe, come back and let us know how it was in the comment or ratings!
Video
Nutrition


As soon as I saw this recipe I knew I had to make them. Had to order the real maple syrup and some new muffin pans but it was worth it! Wish I had kept them in about 5 minutes longer but they were loved!
I can’t wait to make these. Can I brown the butter for the filling? Also can I use Mrs. Buttersworth maple buttery syrup instead of pure maple syrup?
Hi Karen, You can brown the butter for sure. I would try to use pure maple syrup if at all possible, Mrs. Buttersworth is corn syrup with maple flavoring, it is a lot thinner than maple syrup so it might mess up the consistency of the filling and they won’t set right.
Amazing recipe! I’ve made it 3 times now. Once I subbed corn syrup for sone of the maple syrup. Would not recommend! Worth a trip to the store for more maple syrup. Yummy!
Thank you for the feedback, Rebecca!
Thanks for the clean, uncluttered link straight to the recipe – will definitely follow you for that reason alone!
Thanks 🙂 We try to balance being user friendly, but also support our family with the blog. Unfortunately, ads are a part of that.
Such an easy, great recipe. Perfect every time. Not runny. 🏆
Thank you, Tracy!!!! <3
These are incredibly delicious. I did cheat and used premade tart shells, but it was still wonderful. I love raisins and nuts in mine so I added some. The maple creates the perfect flavour and texture. The way it stays gooey in the middle is magic. Will definitely be using this recipe forever. Thank you!
Thank YOU for coming back to let us know!
Did I miss what temperature you bake these at?
350 degrees- last step of making the crust is to preheat the oven to 350 🙂 happy holidays!
This brought so many memories flooding back to me, Christmas baking with my Mom. It is the recipe she used for her tarts. I am going to make them now. I wish I could show you her old cookbook I have sitting here, all tattered and taped, stained from many years of baking for her family and then mine. I miss her so much. Those years baking with her, probably getting in her way in truth, fueled a passion for baking that has been in me since. It is all about the love and connections. Thank you for triggering such happy thoughts. It has been such a difficult year for our planet. Bless you.
Aww, Sandra, I hope they bring you so much love and joy. I can say 100% that they are delicious and I hope they taste just like you remember. Happy holidays <3
The crust is delicious and easy to make but the filling you can taste the egg.
Hi Rhonda- just curious what kind of syrup you used? It is a custard, so it is egg based and will be slightly eggy, but the maple piece is important. Just trying to troubleshoot for others and if you use a maple flavored syrup opposed to a grade real maple syrup, it makes a world of difference. Thanks for your feedback!
I love the texture of the filling. Thanks for sharing this recipe, will definitely be making this one again.
Very easy recipe. I used bought tart shells. I placed presoaked raisins (10 minutes in boiled water) on bottom of each shell. I found the recipe for 15 tarts actually made 24 (with rainsins). I used corn syrup instead of maple syrup. Very tasty. Will definitely be making again very soon!! Thank you very much for sharing this recipe!
Nice! Thanks for your input Shelley, I bet they tasted great with raisins!
Best butter tart we ever had my whole family loved them and so easy to make you get 5 golden stars on these
Oh my! Made these tonight and they knocked our socks off! I’ve only ever had store bought and this is my first time making my own. Over the top delicious! Thank you for this amazing recipe!
Thank you, Kim! So glad you loved them, we do too!